After doing my homework, courtesy of Thomas Buck's "The Art of Tsukamaki" which is available as a full color e-book on Amazon.com for about $10, I chose a style I liked and knew was period. Hiramaki was originally used on tachi and survived into the Edo period. http://www.montanairon.com/gifswords/tsukamaki/hira-maki_dragon.jpg It also doesn't involve twisting the ito (flat cord) as it crosses over each other. As I only have two hands, a couple of clamps and no special jig to hold the hilt core, this just seemed like it would add less to the juggling act I knew it was going to be, particularly as this style does not absolutely require the insertion of tiny paper triangles under the silk.
Stingray skin is traditional, and I wanted a full wrap around the oak core because this cut-and-thrust weapon already sustained impacts that damaged the original rapier-legal tsuba. I found a seller on eBay in China ( changjuanjj-5) with nice hides at reasonable prices. I did, however, underestimate with my first order and ended up with a hide that was just a skosh too small. The next size up was perfect, beautifully white, nice distinct nodes. The smaller one will go on my wakizashi dagger. Sigh, Of course, the place I got the silk ito is out of the color I ordered, so that's back-burnered. (http://www.swordnarmory.com/imported-japanese-silk-ito-green/ They get three weeks, then I'm gonna take my chances elsewhere and hope the color is a good match.)
I bought the reproduction brass menuki on eBay awhile back as well. I should have bought a second pair for the waki because now they don't have that particular style. Or they just won't match. My tsuba don't match anymore as it is.
Samegawa (ray skin) is hard, tough and abrasive. It needed 15 minutes in a dishpan to be pliable enough to handle. I patted it down with towels, put on a pair of work gloves and cut it with a utility knife on my self healing mat because boxcutter blades are cheap. Had I to do it again, I would have made my pattern template 1/16" inch wider in all directions as there was some little shrinkage. I managed to hide it beneath the ito pretty well, but that extra margin would've been nice. I cut it and wrapped it tightly onto the hilt core with hair ties and let it dry in place for a few days, figuring I would use the long Thanksgiving weekend to actually attack the wrapping portion of the festivities.
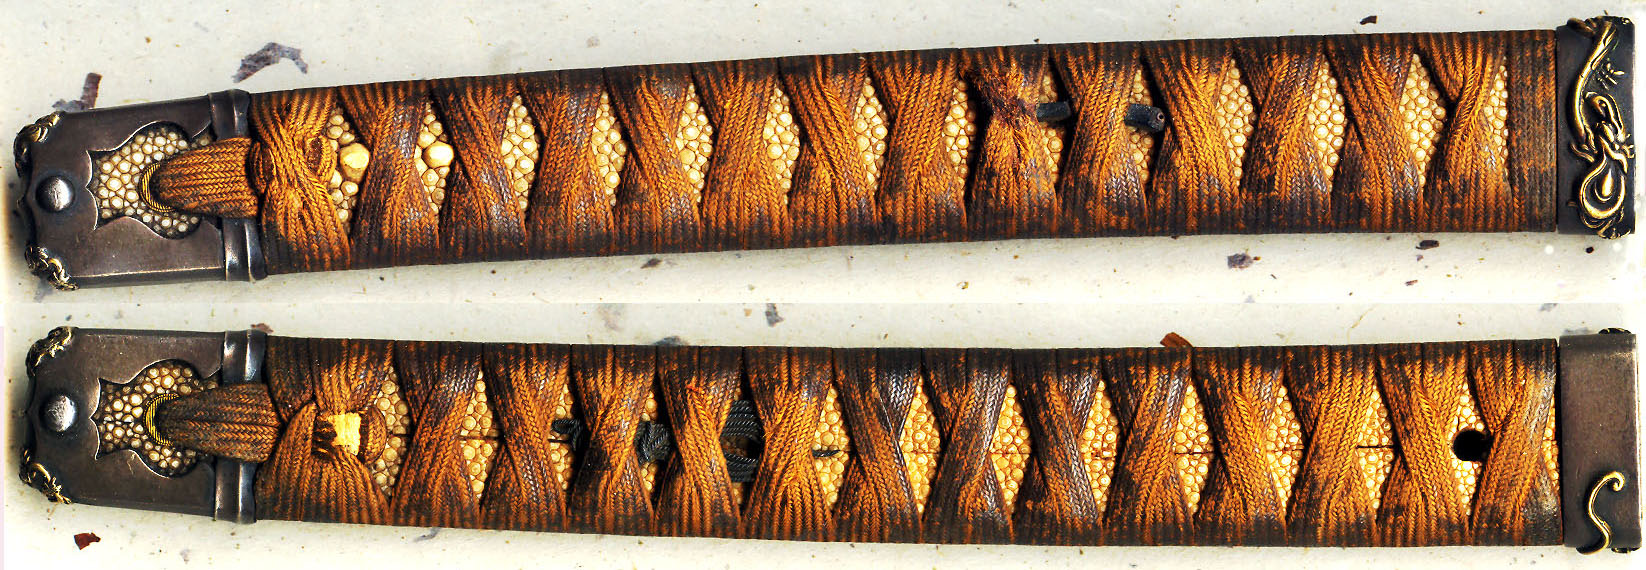
For the unitiated, a katana hilt has an "inside" (ura) and "outside" (omote). Imagine a sword on you left hip, edge upward - remember, katana have only one edge. The lacing has to start at the end closest to the tsuba (guard) and gets tied off at the pommel. Front and back orientation also dictates placement of the menuki - one on the omote about three or four turns from the tsuba, one on the ura about three or four turns from the pommel. Because this is a rapier katana with a threaded tang that fits a screw-in arrangement at the top, I had to work around an anachronistic arrangement of lacing holes instead of a traditional kashira (end cap).
I got about halfway through the ritual of pulling, crossing over, adjusting and repeating, took a couple pictures and posted it to the SCA-Japanese Facebook group. Fortunately someone spotted that I had been crossing the silk in the same direction instead of alternating it, so I chalked it up to good practice and decided to start again this morning.
I will also admit that the menuki were a pain in the ass and I am not to proud to tell you that I used a minute amount of double sided tape to keep them from falling on the floor nineteen times while I tried to lash them into position. Especially since I didn't have a dedicated rotating jig of the sword that normally gets used by artisans who build tsuka properly. Just me and a couple of big spring clamps for when I needed to stop and let my hamburgered thumbs and index fingers take a break.
As for tying that final knot on the top, I threaded some heavy thread through a couple of heavy duty needles, stitched it through the ends of the ito and used that to pull it through the holes in the hilt housing at the top and then again through the knot.
Considering that this is a new art to me, yeah, I see where all the mistakes are, but it mostly looks pretty good. That green is delicious, and the glint of "gold" menuki and gleaming white samegawa are just so. I'm pretty pleased.


no subject
Date: 2017-11-26 02:31 am (UTC)no subject
Date: 2017-11-26 07:58 am (UTC)